How to make
The classic French bread is the most favorite among all baguettes. This is a long baguette with a crispy crust and very little soft core.
It would be difficult to make really long baguettes at home with an ordinary oven, but can make them as long as we can and enjoy this wonderful French bread.
Here is the recipe:
Sift the flour into a bowl and make a well. Pour half of the water into it - slightly warmed (37-40 degrees no more), a spoonful of sugar and crushed yeast. Stir, in order to mix it with a little flour and cover it with a towel for 10 minutes.
Add the remaining water, oil and sugar to the activated yeast and sprinkle the salt on top of the flour.
Knead a smooth and elastic dough, by adding flour if necessary, without overdoing it, because when kneading the dough it will aquire the necessary elasticity. Work with smooth movements for 10 to 15 minutes. This time is needed for the bread to become tasty and for the aroma to develop well.
Form it into a ball, grease it and place it in a bowl covered with cling film to double its volume - 40-50 minutes.
Divide the dough into 4 equal pieces and stretch out and press each one with your fingers, by forming it into a rectangular shape. Start rolling it up, but instead of the standard way, you need to press the end of the base at each fold to make it stick. Do that until it is completely rolled up. Leave the baguettes aside for 5-10 minutes.
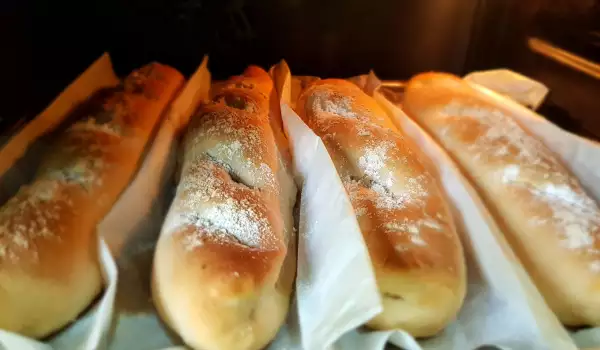
To put the bread in a tray, you will need a little trick. Take a long piece of baking paper and make folds as subdivisions more or less as thick as you want your baguettes to be. The aim is that the dough doesn't move to the side when it rises again and to keep them as thin as possible without sticking to each other or becoming flat. There are special concave trays with beds for this type of bread, but if like me, you don't have one, will think of another way with the materials they have at hand.
Stretch out the baguettes to the length of the tray. This is done by placing your palms on each one and making back and forth movements without pressing the dough too hard, so that you don't remove the air from it.
Place each finished baguette in the prepared paper bed on the tray. Leave them to rise once more for 30-40 minutes in a warm room.
Preheat the oven to 480°F (250 degrees) by placing 2 bowls of water inside. It will generate steam, so that we can have the desired and typical crust for this type of bread.
Make 3-4 cross cuts on the baguettes, by being careful not to press to hard, because otherwise they will flatten. Sprinkle them with flour or semolina (semolina can be sprinkled on paper before laying the bread in it).
Put them in a preheated oven and reduce the heat to 450°F (230 degrees). Bake them for about 20 minutes or until they aquire a golden brown color. Then leave them in a switched off oven for 10 minutes, with the door slightly open.
Leave them to cool on a wire rack and you can enjoy a crispy classic French bread.
Keep in mind, that if you do not consume all of the baguettes on the same day and store them in a bag, the crispy crust will soften.
You can bake as much of them as you want and store the rest of the dough in the refrigerator after it has risen the first time and use it the next day or the day after.
Enjoy your meal!
