How to make
Dissolve the yeast in the slightly warmed water along with the honey. Do not wait for it to activate, but immediately add the yogurt at room temperature, then the flour with the salt.
Mix well and when the flour has absorbed the liquids, start kneading with a mixer with dough attachments, as it is very soft and will be difficult to work with your hands.
Pour a little flour (about 40 g more) and knead with the device for about 4-5 minutes (if you do it by hand, the kneading will take almost twice as long. The dough should become elastic and very soft, highly hydrated (it must be that way).
Transfer into a greased bowl with a lid and leave it to rise for 90 minutes, opening the lid twice and folding it on each side by initially pulling the dough and then folding it towards the center.
With the final fold, shape the dough into a ball or loaf and place it in a ceramic dish with a lid (suitable for baking) or a large glass baking dish with a lid. In general, keep in mind that because the dough is too soft, the bread will take the shape of the dish when rising.
It is important to clarify that I baked in a yen glass that was heavily greased, but I had trouble removing the bread as it stuck firmly to the glass. Therefore, I recommend lining it with baking paper and cutting off the protruding ends so that you can close the lid afterwards. Actually, that's how it was described in the bread recipe I was using, but I decided not to follow it and made a mistake. That's why I warn from experience.
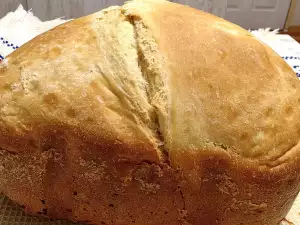
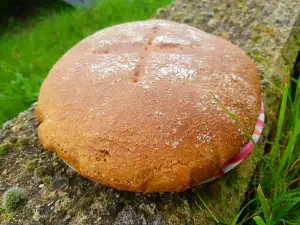
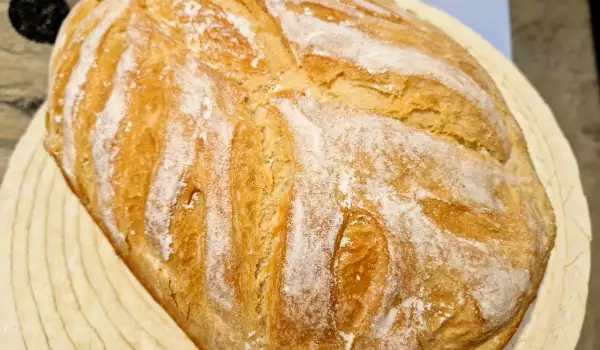
After putting the white bread in the vessel, cover it again and let it rise. When it has risen, but not yet completely risen, open the lid and sprinkle generously with flour. With your palms, spread it gently and lightly on the surface of the bread, without pressing, so that it does not sink.
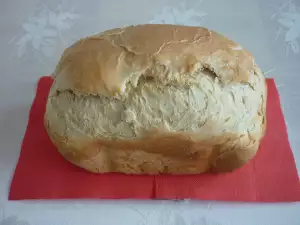
Take a very sharp knife, a clean razor blade or a special pastry knife and draw with light cuts on the surface layer what you like and can. In my case, the decoration is simple, since I am doing it for the first time and I wanted not to go into complicated drawings at first.
Next time I will certainly be more daring (and there will be a next time, since the bread is unique and I will prepare it regularly).
Cover the dish again after you have painted the bread. Let it rise a little more (total of at least 35-40 minutes from the beginning of the transfer to the baking dish).
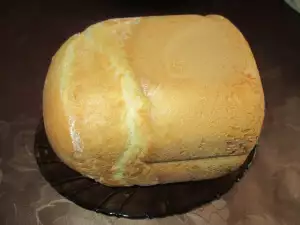
Preheat the oven to 390°F (200°C) and insert the covered bread. Bake for 10-12 minutes, then reduce the temperature to 360°F (180°C) and bake for another 35 to 40 minutes or until a nice golden brown color is obtained.
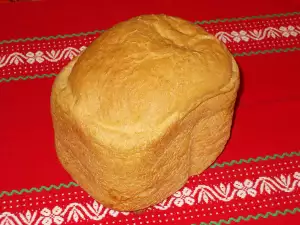
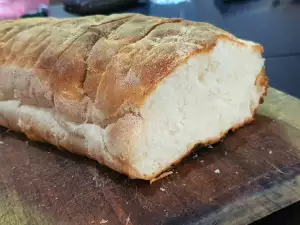
After removing from the oven, immediately remove the lid and remove the bread. Let it cool on a wire rack and serve it.
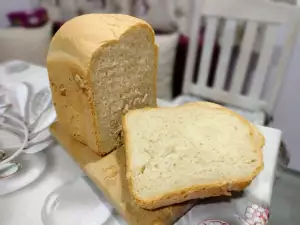
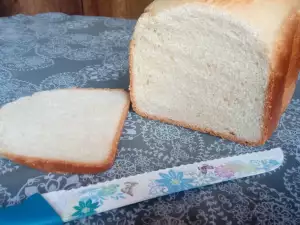
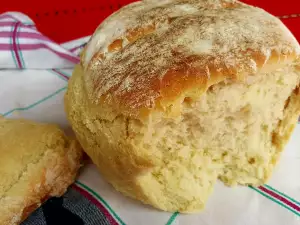
This art bread is gorgeous! The most delicious and crispy crust with a soft core inside!